Quick answer: A “Martha” is a small mushroom fruiting chamber built from an indoor greenhouse with shelves, a humidity-retaining cover, and a zip-up curtain. This guide walks you step-by-step through building a nearly automated Martha for under $200 — covering humidification, fresh air exchange, lighting, and automation. Aim for 80 to 95 percent humidity, 4 to 6 air exchanges per hour, 50 to 70 degrees F, and 12-hour light cycles.
Meet Martha, the Mother of Mini-Mushroom Fruiting Chamber!
So what does a mushroom fruiting chamber and Martha Stewart have in common?
Absolutely nothing. Yet somehow, Martha Stewart has found a way to infiltrate mycology. And if you ever find yourself growing enough mushrooms that you need a mini-greenhouse, well, you’ll probably meet “Martha” the Mushroom Fruiting Chamber. Named after a Martha Stewart-branded hanging closet… The “Martha” is any small-sized mushroom fruiting chamber with shelves, a synthetic (typically reinforced plastic), non-porous cover to retain humidity, and a zip up curtain so you can access the inside. Go ahead. Google “Martha mushroom fruiting chamber” and see what you find. You’ll soon discover that there are a million ways to make one and a million opinions of what works best, from simple units for less than $100 to tricked out builds costing over $1,000. The rabbit hole is deep and gets overwhelming fast.
WHAT YOU WILL LEARN
- Tools & Equipment You Will Need
- General Parameters
- The Challenges
- Step-by-Step How to Set Up Humidifier
- Step-by-Step How to Set Up Fresh Air Exchange
- Setting Up Lighting
- Automating Your Martha Fruiting Chamber
- Maintaining Your Martha Fruiting Chamber

Free Beginner’s Guide
Grow your first mushrooms — for free
Get the free guide that walks new growers through the whole path — plus 5 free videos to send you on your way.
- The exact gear you need — and the pricey stuff you don’t
- Where to source spores & cultures without getting scammed
- How to spot and beat contamination before it wipes out your grow
EQUIPMENT LIST
- Indoor greenhouse
- Plastic tray/pan the size of your greenhouse footprint
- Perilite
- One roll of fine mesh screen
HUMIDIFICATION
- PVC pipe or flexible duct, 2 inches (5cm)
- PVC “T”, 2 inches (5cm)
- PVC elbow, 2 inches (5cm)
- Vicks Cool Mist Humidifier
- Inkbird hygrometer
EXHAUST
- 3-4 inch (7-10cm) waterproof fan
- 3-4 inch (7-10cm) waterproof fan
- 1-minute timer
- Power strip
OPTIONAL
- 2 rolls of 6500k LED LED lights
- 4 inch (10cm) air diffusing ventilation ports
TOOL LIST
- Knife
- Scissors
- Duct Tape
- Marker
- Zip ties
- Measuring Tape
- Something capable of cutting PVC pipes e.g. handsaw, miter saw or PVC cutter. Many hardware stores will cut your pipe for free
General Parameters for a Martha Mushroom Fruiting Chamber
Humidity
- 80% to 95% Relative humidity
Fresh Air Exchange (O2 vs CO2 levels)
- 4 to 6 fresh air exchanges per hour
Temperature
- 50°F to 70°F (10°C to 21°C)
Lighting
- 12 hour cycles of light/dark
The Contradictions of Martha
Mushrooms love oxygen but exhale carbon dioxide. Mushrooms love humidity but need constant fresh air exchange. Mushrooms love light but grow best at moderate, steady temperatures. In short, mushrooms are hypocrites! Therein lies the challenge, and fun, of building a fruiting chamber How do you provide fresh oxygen and exhause out the carbon dioxide (and spores)? How do you continuously circulate fresh air within your greenhouse while maintaining a constant high humidity level? How do you provide lighting without overheating? You get creative, dammit! Below, we’ve explained exactly how to build out a Martha Mushroom Fruiting Chamber. each section pertains to a certain system operating within your design (humidification, fresh air exchange, lighting, etc).Humidification
Step 1: Buy equipment and tools, prepare workspace
Assemble your equipment and tools, and prepare your workspace. Remember that most mushrooms like temperatures in the 50°F to 70°F (10°C to 21°C) range. If you’ll be growing in a space that’s warmer than that, consider adding a small air conditioning unit to your list. If it’s quite cold, consider adding a reptile heating map, which you can place at the bottom of the greenhouse. Mushrooms will grow outside this temperature range. It just won’t be optimal.Step 2: Assemble greenhouse and water catching tray
Assemble your greenhouse, tying down the wire shelves to their support beams using zip ties or forgoing the shelving completely if you plan to make grow bags large enough to sit securely atop the support beams. You will want to position your greenhouse near a window or in any place where you can easily exhaust to the outside (more on this later). Once assembled, place the greenhouse atop the plastic tray or pan. Make sure the bottom of the greenhouse’s exterior is tucked inside the pan so any excess condensation along the inner walls of the greenhouse will collect in the pan. Spread a thin, even layer of perlite across the tray.
Step 3: Decide where to place your humidifier and ducts/pipes on your fruiting chamber
Position your humidifier along one side of your greenhouse. Draw two circles along the greenhouse’s lengthwise exterior, one about halfway up the greenhouse and another hole near the top. This is where you will pipe in your PVC pipe so that humidity from the humidifier will go through the pipes and into your greenhouse. This does not need to be exact. It will serve as a visual aid only.
Step 4: Assemble humidifier, measure from humidifier to first hole
Assemble your humidifier, fill with water, and turn on to make sure it works. Turn off. Measure the distance from the component of your humidifier where the humidity is expelled to the first circle halfway up your greenhouse. You want to cut your PVC pipe to about this length. Keep in mind that you will be attaching a PVC “T” piece here so the pipe can turn 90 degrees and enter the greenhouse. We recommend attaching the “T” to the end of your uncut PVC pipe to measure how much additional length it adds, then incorporating that figure into your measurement.
Step 5: Cut Duct/PVC pipe, attach to humidifier, attach PVC pipe “T”, pipe into greenhouse
Cut your PVC pipe to size, then attach one end to your humidifier’s humidity expeller component using silicone or duct tape. Attach the PVC “T” to the other end of the PVC pipe. Measure the length of pipe you will need to go from the “T” into the greenhouse. Then, cut this small piece and attach it to the “T.” You should now have a PVC pipe going from your humidifier up the side of your greenhouse about halfway, then turning 90 degrees and hitting the exterior of greenhouse. Where it hits the exterior, cut a circular hole so the pipe fits snugly within and enters the greenhouse.
Step 6: Cut Duct/PVC pipe, attach to PVC elbow, pipe into greenhouse
Measure from the “T” to the second hole near the top of your greenhouse (remember to account for the additional length of the PVC elbow). Cut the pipe to size. Attach one end of the pipe to the “T.” Attach the PVC elbow to the other end of the pipe. Measure the length of pipe you will need to go from the elbow into the greenhouse. Then, cut this small piece and attach it to the elbow. You should now have a PVC pipe going from your humidifier up the side of your greenhouse about halfway, turning 90 degrees at the “T”, entering the greenhouse, and a pipe exiting the other end of the “T’ and continuing upwards until it turns 90 degrees near the top of the greenhouse. Where the pipe exits the elbow, directs toward the greenhouse, and hits the exterior of greenhouse, cut a circular hole so the pipe fits snugly within and enters the greenhouse.Step 7: Confirm you didn’t screw up
Step back and observe your mushroom fruiting chamber. Make sure it looks similar to the photo below.
Step 8: Test out humidifying system
Turn on your humidifier. Make sure humidity does not leak from where the PVC pipe connects to the humidity expeller. Open your greenhouse and make sure humidity is entering the greenhouse from both pipes. If the flow of humidity from both pipes is not even (it probably will not be), consider covering part of the lower pipe with tape, a mason jar lid, or whatever else works and will be easy to clean/detach. This will force more air up to the highest pipe, evening out the flow. If you are only fruiting a few bags at a time, this last step may not be necessary. If you plan to fruit a lot of bags, you will want to do this to ensure even humidity dispersal throughout your Martha Mushroom Fruiting Chamber.

Fresh Air Exchange
Word to the wise
Mushrooms release millions, billions, and sometimes trillions of spores, called a “spore load.” Oyster and Reishi mushrooms have especially prolific spore loads. Inhaling this load is not good for your lungs. YOU NEED TO EXHAUST YOUR GREENHOUSE TO THE OUTSIDE. Ok, now that that’s handled, let’s show you how to do this.Step 1: Test exhaust fan, measure from greenhouse to outside
Attach your exhaust fan to the controller/connector and plug it into a power outlet. Make sure it works. Turn off. Disconnect from the power outlet. Next, take a measurement starting from the back, bottom corner of your greenhouse exterior opposite the side of your humidifier, and ending at the outside/window where you will exhaust your greenhouse air.
Step 2:
Place one end of your duct up to the bottom corner of the greenhouse where you just took the measurement, and trace a circle around the duct onto the greenhouse exterior. This is the size and shape of the hole you will cut. Cut the hole. Next, cut a piece of duct long enough so that it will extend into the greenhouse about 2 to 3 inches (5 to 7.5 cms) and have a 2-3 inch length protruding outside the greenhouse.
Step 3:
Take the ducting you just cut and the exhaust fan and slowly slide your exhaust fan into the duct so the fan sits at the halfway point. This is your inline exhaust fan set up. Turn on the fan to ensure it can spin without being impeded by the ducting. Slide the duct into the hole you cut in Step 2 in your greenhouse. You want the fan to sit inside the duct at about where the duct crosses from the interior to the exterior of the greenhouse.Step 4:
All you need to do now is attach another piece of duct to the piece you just made so the air and spores can exhaust outside. Cut another piece of ducting to the length you measured in Step 1. Give yourself a little extra moving room by adding a foot or two to this measurement. Attach one end of this piece to the small duct with the fan inside that you built in Step 3. Duct tape works great for this.
Lighting
You can provide light to your Martha Mushroom Fruiting Chamber by placing it near a window that receives indirect sunlight for about 12 hours/day. If that is not possible, you can buy 2 rolls of waterproof, 6500K LED lights that turn on for 12–18 hours per day, using a digital timer to regulate when the lights turn on and off.Setting up your Lights
Starting in the back top corner of the greenhouse, run an LED strip down one vertical post of the frame to the bottom of the post, then across one bottom beam, then up the other vertical post, that runs parallel to the first. Use zip ties to secure the LED strip to the posts. Then use the second roll of lights to do the same thing on the other two vertical posts and bottom support beam. Make sure your lights are directed toward the center of the greenhouse. Also, make sure you start the strip in such a way that the power source plug is in an upper corner of the greenhouse so it can exit out the greenhouse and into a wall power outlet.
Fresh Air Intakes
Using the humidifier we recommend, you will already get some fresh air exchange every time the humidifier runs as that model pulls air from the outside environment. But this is oftentimes not enough oxygen, especially inside homes (where carbon dioxide levels are higher than outside) and especially with Oyster mushrooms, which are sensitive to carbon dioxide. To provide additional oxygen, your fresh air intake system can be as simple as slicing a few slits along the bottom, middle, and top of your greenhouse, then covering them with fine mesh screening to prevent bugs from entering. Or, you can get a bit more technical and invest in a few 4-inch (10 cm) air diffusing ventilation ports. Either way, the goal is to provide some passive fresh air exchange while keeping out bugs.

Automating Your Martha
Exhaust Fan
Plug your exhaust fan into the digital minute timer on the equipment list. Follow the instructions in the box to set up the timer. Everything will depend on your individual set up (how many grow bags, what species, location in house, ambient oxygen and carbon dioxide levels) but a good baseline timer set up is 2 minute on followed by 3 minutes off, repeating.
Humidification
If you purchased an Inkbird, simply follow the directions or watch a couple Youtube videos to learn how to calibrate it (basically putting the sensor in a sealed plastic bag with a wet paper towel for a half day, which should be around 100% humidity). Then, plug your Inkbird into your power strip, set your parameters as explained in the directions, and plug your humidifier into the Work 1 outlet. You want to position your sensor away from the humidifying pipes. Sensors don’t do well when overly wet. We recommend positioning it in the top corner of the greenhouse on the side furthest from the ducts/PVC pipes. This way, if it reads 90% humidity, you know it is 90% throughout (and probably a bit higher closer to the ducts/PVC pipes). As for parameters, check our recommendations at the beginning of this post but remember that your mushrooms will always be the best indicator. Our differential is typically set at 5%, meaning that once the humidity drops 5% below what we have it set to (85% or 90% depending on the species), the humidifier automatically turns on.


33 Responses
Hello friend, I have a question about the exhaust on the Martha. I have to have this in my basement and only have glass block windows. I’m wondering if there is another way to vent. I know if you have no where to vent a dryer. Hardware stores sell a canister you fill with water and then hook your dryer hose to it. Do you think this could be an option?
i think this would work. It would be a lot better than venting into the room where spores could cause respiratory problems.
The water canister or “heat vent” type will work, but you will want to buy some blue HVAC filter media to wrap around or cover the air discharge if inside the home.
Cut a couple pieces to allow alternating them by rinsing them out with a kitchen spray nozzle or shower head and allowing to air dry. You’ll always have one clean and dry set to swap out every 2-4 weeks.
Hi. If I’m going to grow mushrooms in a monotube, does it make sense to have it inside a Martha-type greenhouse? Should the monotube be with the lid on, or uncovered?
A monotub is a self contained and self sufficient growing and fruiting chamber. When done properly, a monotub has the required free air exchange and humidity control. So, no, you would not put a mono tub in a martha.
👆This
I agree but I actually bought my Martha went I still had monotubs fruiting. The monotubs are small enough to go inside and I crack the lid so they can get misted. Works okay but I’m switching to trays next. Any recommendations what you cover your tray with during colonization? I was thinking Saran wrap.
no its either mono tub ormartha
Hey People!
Love the guide. Quick question about Temperatures. I want to set this up in my basement but it gets quite cold down there. Especially at night around this time of year. (I Live in the UK).
What do you suggest I should do? Space heaters don’t work that well as the basement is uninsulated and I’ve read that heat mats are a bad idea?
Thanks!
It’s always species-dependent but mushrooms like cooler weather. I’m sure you will be fine as long as it doesn’t get colder than ~7C
No worries! The temperature dropping isn’t too much of an issue in the growing process. As long as it doesn’t freeze you should be good!
Hey I recently bought a lava rock heater/humidifier specifically designed for Martha tents. I bought it from mycolabs. It’s designed to be at the bottom of your tent and is water proof.
WOw amazing! How’s it working ofr you so far?
100 watt Terrarium ceramic heat emitter
Love this set up! Wondering, is a multi layered entry for humidity necessary? I actually put a air purifier at the bottom of the tent with a heat lamp on bottom of a metal tray with lava rocks submerged in water. The heat lamp heats the lava rock causing water to evaporate and the air purifier then sucks it in and distributes the heat evenly. Also blowing the humidifier Fog around so not sure if the multi level would be needed in that retrospect. Just love to hear your thoughts about the tek
Hi
Good design development Small size growing room
Like it
Santosh Rai
CEO/ expert trainer consultant Mushroom farming
Indian orgànic cultivate farming company faridabad HR Delhi India
This is a wonderful walkthrough, and I am eagerly waiting for the supplies to arrive. How do you refill your humidifier while keeping it attached to the pipe? Most of the ones I’ve seen seem to require removing the tank to fill it.
I drilled a small hole into the tank and fill using a funnel. Works pretty ok
I want to put an inline exhaust fan on my martha greenhouse to vent it. What cfm fan should I use?
Any fan that’s water proof, I’m not sure the watts but it depends on how big your space is. Those fans are on Amazon for 30-40 bucks.
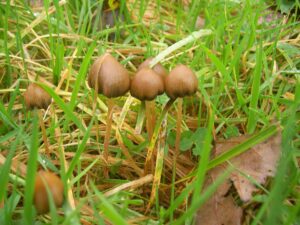
Hi, Will this setup and temps work with magic mushrooms? Thanks.
It sure does!
how do you refill the Vic’s humidifier? Seems like its all nicely taped up and cant be moved?
Hi! Thanks for posting this. Solid build with good info.
My question is if this were, say, 3 times as long, would you need to have 3 humidifiers or 3 exhaust fans? Or can you just lengthen the setup, do everything the same, and still achieve the same humidity and air exchange parameters?
Hi there, is there a way to reverse engineer this to dehumidify a martha setup? I’m trying to create something with plant cultures that are too humid
Inkbird IHC-200 Humidity Controller will control both a humidifier while plugged into “Work 1,” which causes it to turn on when the humidity drops too low and “Work 2” is for plugging in a dehumidification system.
Basically, a Martha is an oversized mono tub.
Is there any way around the use of H2O2 (30% concentration) or a substitute as it looks like it’s a difficulty in purchasing this product in the Uk. Also my only option to vent out would be into a loft space would this be acceptable? Thanks.
See above comments on interior venting.
I’ve seen a lot of Martha tents where the mushrooms grow right out of the colonized bag. What is a good practice there, make a few small cuts in the bag to grow from? Make one large cut?
Thanks for the detailed post. About the fine mesh, is there another outside layer of plastic cover or is it open to the air through the fine mesh? Already colonised substrates would be hard to contaminate right? I thought it should be air tight (also to contain humidity levels as well?)
Hello, thank you for the guide. I recently set up my Martha a slightly different way. My misting humidifier has a hose that I insert through the top of the plastic so that it can rain on everything below and my exhaust fan is at the top. I had the fan on 24/7 before but it dried out my substrate and used all my mist so I had to refill the humidifier constantly. I’ve read some other guides as well and just for comparison and contrast, is it necessary to poke extra holes for ventilation? Doesn’t your exhaust fan create fae? Based on my fan settings I only need it on for 30 seconds per hour just to achieve my 4-6 air exchanges. I never considered having it in minute on/off cycles… Would love to hear more. I have a few trays in the fruiting stage right now but all seem a bit stalled and that may be do to an unbalance of CO2 and fae. Any tips would be great thanks.
How long do I run my fan and my humidifier for?