
Quick answer: Grain spawn is hydrated, sterilised grain — rye berries, wild bird seed, or popcorn — that’s been inoculated with a mushroom culture. The mycelium eats through the grain and turns it into living “seed” you mix into a bulk substrate to grow a full crop. A batch takes about an hour of hands-on work, then 2–3 weeks of colonisation.
Let’s talk about grain spawn — the step that quietly decides whether your whole grow works.
Honestly, if there’s one stage I’d tell a new grower to slow down and respect, it’s this one. Grain spawn is the bridge between a tiny, fragile culture and a tub full of mushrooms. Get it clean and healthy and the rest of the grow tends to flow. Get it contaminated and… well, you start again. I learned that one the hard way — my first batch of jars went green with mould inside a week, because I’d inoculated them while they were still warm. Classic rookie move. So let’s do it properly.
What is grain spawn?
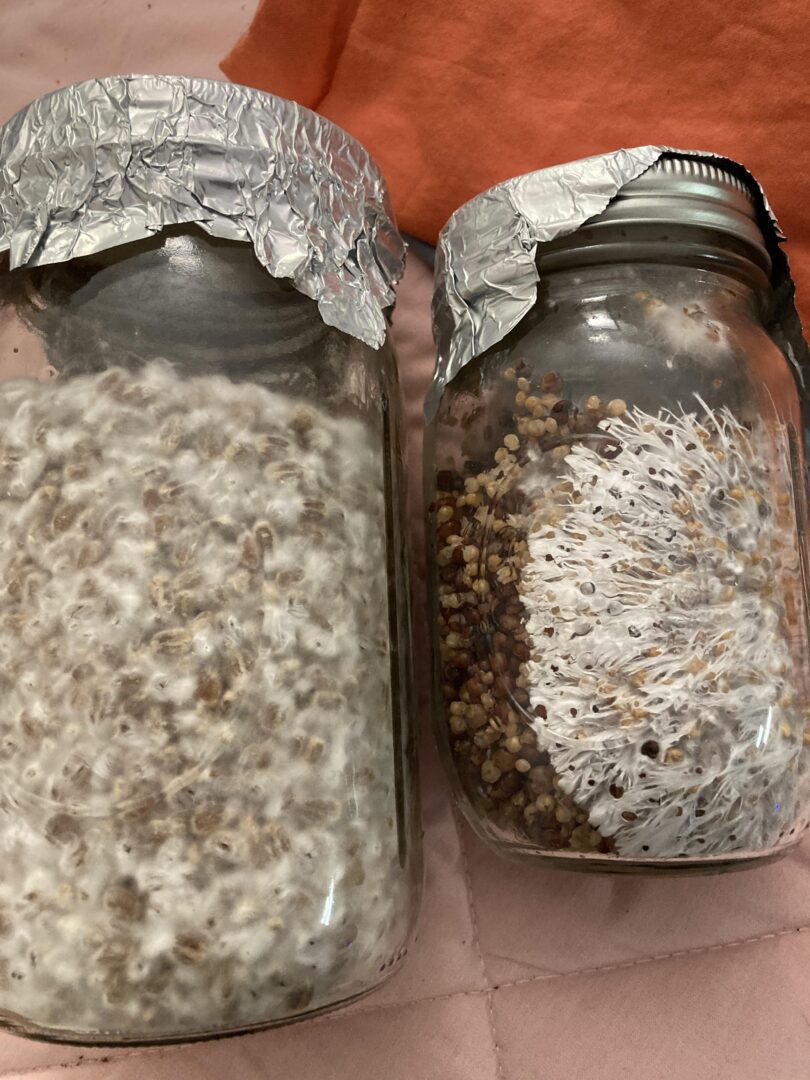
Grain spawn is exactly what it sounds like — grain that mushroom mycelium has fully colonised. You take a culture (from a liquid culture, an agar wedge, or a spore syringe), introduce it to a jar of sterilised grain, and the mycelium spreads through every kernel, using the starchy grain as fuel to multiply.
The whole point is multiplication. A few millilitres of culture becomes an entire jar of living, colonised grain — and that jar becomes the “seed” you scatter through a much larger bulk substrate. It’s how a speck of mycelium turns into a harvest.
Which grain should you use?
Rye berries are the classic — they hold water beautifully and the mycelium loves them. Wild bird seed is cheap, easy to find, and works great. Popcorn is a beginner favourite because the big kernels are forgiving and easy to shake. Honestly, any of them work. Start with whatever you can get locally and don’t overthink it.
Free Beginner’s Guide
Grow your first mushrooms — for free
Get the free guide that walks new growers through the whole path — plus 5 free videos to send you on your way.
- The exact gear you need — and the pricey stuff you don’t
- Where to source spores & cultures without getting scammed
- How to spot and beat contamination before it wipes out your grow
How to make grain spawn, step by step
1. Hydrate the grain
Your grain needs to take on water — but not too much. Soak it for 12–24 hours, or simmer it for around 20–30 minutes, until the kernels are plump but not split open and mushy. Drain it well and let the surface moisture dry off. Surface-dry, inside-hydrated — that’s the target.
2. Jar it up
Load the grain into jars with a modified lid — a filter patch or micropore tape for gas exchange, and a self-healing injection port if you’re using a syringe. Don’t pack the jars full; leave headspace so you can shake them later.
3. Sterilise
Into the pressure cooker. Around 90 minutes at 15 psi kills off the competing moulds and bacteria hiding in the grain. Then — and this matters — let the jars cool completely before you go near them. Inoculating warm jars cooks your culture.
4. Inoculate
This is the make-or-break moment, so do it inside a still air box. Inject your liquid culture or spore syringe through the port, or drop in an agar wedge. Clean technique here is everything.
5. Colonise and shake
Now it sits — somewhere dark, around 21–24°C. After a week or two you’ll see white mycelium spreading from each inoculation point. Once a jar is roughly 20–30% colonised, give it a firm shake to spread those colonised kernels around — it dramatically speeds up the rest. Full colonisation usually takes 2–3 weeks.
From grain spawn to bulk
Once a jar is fully white and the mycelium has had a few days to firm up, it’s ready. You mix it into a pasteurised bulk substrate — usually around a 1:2 ratio of spawn to substrate — and the colonised grain seeds the whole tub. From there it’s on to fruiting in a monotub.
Common mistakes to avoid
Overhydrated grain — wet, split kernels breed bacteria. Inoculating warm jars — let them cool fully first. Working in open air instead of a still air box — most contamination walks in right here. And opening the jar to “check on it” constantly — every time you crack the lid you invite something in. Patience beats fiddling, every time. If you do see off-colours, our guide on spotting contamination will help.
Frequently asked questions
Usually 2 to 3 weeks at 21 to 24°C, faster if you shake it once colonisation begins.
You don’t have to, but shaking at around 20 to 30% colonisation roughly halves the total time. It’s worth it.
Popcorn or wild bird seed. Both are cheap, forgiving, and easy to find.
You can, but mixing it into a bulk substrate gives a far bigger harvest. That’s what it’s designed for.
Want the whole picture?
Grain spawn is one stage of a bigger cycle. Our guide to growing magic mushrooms walks through all six stages from spore to harvest, and the Online Mushroom Cultivation Course shows every transfer on video. The Fungi will meet you halfway — you just have to keep things clean.